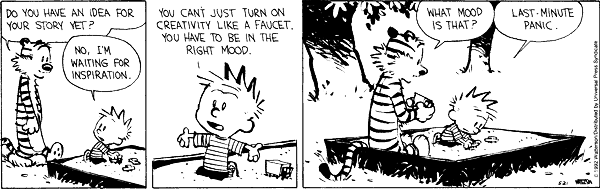
Staying on the time/ffmpeg topic, this blog will demonstrate how to reverse a video, essentially stepping backwards in time.
Since FFMpeg functionality is fluid with new features, and sometimes command-line arguments, changing along the way I've primarily stuck with a known version in my posts; namely FFMpeg v2.7.2. This is relevant because in this particular post there are two ways to reverse a video; 1) deconstruction frame-by-frame followed by reassembly, 2) a video filter available in newer versions of Ffmpeg.
Source Video
Let's start by grabbing an interesting video to work from. Calvin and Hobbes certainly will fit the bill.
For newer versions of FFMpeg, this is simply a matter of applying the 'reverse' video filter, like so:
$ ffmpeg -i clip.mp4 -vf reverse reverse.mp4
Alas, with older versions of FFMpeg this can be also done, just a little more heavy lifting involved. In general, we'll deconstruct the video into a series of frames, then re-encode by supplying the frames in reverse order.
I won't embarrass myself referring to being an amateur videographer but I have set up a video camera, pointed it at something worthwhile and hitting record. With a high-def camera and a wide angle lens you can capture life in the making. While cameras offer zoom capabilities I'm far more likely to lose the subject so I've made the habit of setting the camera up on a tripod, zooming out to capture the entire scene and adding digital zoom effects post-processing. In the age of high-def cameras.....why not? I'm less likely to miss the shot and have numerous tries in adding effects afterwords.
Let's grab a video, apply a text target overlay (to make sure we're zooming where we think we are) and then zoom to that location.
Overlaying an image atop a video is a good way to add content to an informative video, or a means to apply a watermark.
In it's simplest form, the command takes the form of:
- specifying two input files, a video file and an image file
- image scaling size
- image overlay location
$ cat go

#!/bin/bash

VidFile=/tmp/foo.mp4
ImgFile=/tmp/image.png
OutVidFile=/tmp/output.mp4
If you want to have the overlay fade in/out the command is slightly more complex, the filter requires a fade in timestamp and a fade out timestamp. The following command has the image fade in at 5 seconds, and begins fading out at the 10 second mark:
FFMpeg has a full array of video and audio filters, specify the right parameters and it produces pure magic. The filter scalars can readily be specified as filter static parameters or in some cases based on time. But, what if you wish to dynamically modify filter parameters dynamically or in real-time? When compiled with ZeroMQ (0MQ) support, some filters can be adjusted in real-time by sending filter commands vi 0MQ.
The 0MQ support is optional, not configured by the default configuration, so it likely requires building Ffmpeg from source and configuring it for ZeroMQ support. The build procedure takes the form of a typical autoconf; configure, make, make install. Refer to my previous post for building on Ubuntu which includes instructions for adding package dependencies and building with what my common feature set; Building FFMpeg. The --enable-libzmq configure flag enables ZeroMQ based filter commands. It also requires installation of ZeroMQ development libraries pre-compilation (also found in the instructions).
Not all FFMpeg filters accept ZeroMQ commands, the ones that do are documented in the documentation; FFMpeg Filters, look for 'This filter supports the following commands'.
It's best to start by setting up your command line sequence, then update it to account for ZeroMQ command inputs. The FFMpeg documentation indicates the hue filter supports ZeroMQ commands; http://ffmpeg.org/ffmpeg-filters.html#Commands-14
To apply filter commands via ZeroMQ you need to:
1) know the internal filter name of the pipeline
2) add ZeroMQ input to the filter
3) send the command via zmqsend command
We specifically added debug logging to our FFMpeg command so we could learn the name of the internal filter; Parsed_hue_1 [Parsed_hue_1 @ 0x3a1e600] H:0.5*PI h:90.0 s:1.0 b:0 t:11.9 n:357
Let's add ZeroMQ input to our filter, note the slight modification to our previous command;
Lastly, re-run the above command and within a new terminal send a hue filter parameter update; $ echo Parsed_hue_1 h 50 | zmqsend $ echo Parsed_hue_1 s 3 | zmqsend
After sending commands to adjust the h and s parameters you should see the video change.
Whelp, that's about all I've got. While I've on-and-off looked at ZeroMQ integration with FFMpeg on a few occasions over the past years I've never found any solid documentation. Hopefully this will help set you on your way. I'll likely post more as I go.
We installed a security camera at our house and it, like most, has the ability to capture video based on motion. Unfortunately robust motion detection tends to introduce latency as it accrues sufficient motion to determine that the event is significant and not noisy things, like a leaf blowing across the lawn. The trouble with this is that the time leading up to the motion is often lost from the video capture and you're left with part of the event. For example, it's not uncommon for a video of the mail-person delivering a package starting when the person is well within the scene rather than a more complete video of the person as they enter the scene.
Ideally, what you'd want from a security system is to have a robust motion detection algorithm, but once a motion event has been detected to provide video leading up to the motion, say 10 seconds back and forward. This could be accomplished by buffering video and bundling this video buffer into the captured video.
This is surprisingly easy with FFMpeg and is the focus of this post. Read on ye seeker of FFMpeg sexiness.
Let's break down a simple implementation:
capture video from a camera into 10 second segments, with a common naming convention that includes an incrementing numeric (making each file name unique)
a simulated trigger event which responds by grabbing the last X segments and concatenate into a final video file
Capture Video Segment (e.g. Buffers)
Our video source will be our USB camera. In the interest of posterity, and to verify our concatenation of the video segments is seamless and in-order, we'll overlay the current time upon the video. The segment subcommand automagically creates video segments of the specified length. You can specify a segment file naming convention as well.
The following example captures the camera video, applies a time-stamp overlay and generates files in the form {/tmp/capture-000.mp4 /tmp/capture-001.mp4..../tmp/capture-999.mp4}
Two key things need to be done in order to concatenate the video segments into the final video:
determine what video files to concatenate
order the video files in order of capture
concatenate them into final video
The following script does precisely that. The find command looks for files that are less than 60 seconds old and sorts them via epoch time. Each file is added to a temp file, this temp file has the list of video segment files in-order. FFMpeg takes this list of files and concatenates them in-order into the final video file.
$ ./grabCamEvent /tmp/foo.mp4
The above command would result in a 60-70 second video file starting approximately 60 seconds ago. Approximately because the video segment length comes into play here.
This is primarily the foundation for a proof-of-concept. A proper solution would include periodically deleting old video files and writing the video segments in such a manner as to not burn out your hard-drive, perhaps replacing the destination with a ram-disk.
I'm genuinely puzzled, given the ease of this solution, why more security systems don't employ such a feature.
Although 'make' is most often used to compile, it's use far exceeds that. 'Make's greatest strength is that of it's dependency engine. By specifying a set of rules, 'make' executes the rules in order to satisfy the dependency. This is precisely why 'make' is a good match for ffmpeg, the remainder of this blog will hopefully demonstrate that.
Let's start with a simple rule; we need an input video file which can be satisfied by our first make rule:
By issuing 'make', it will attempt to satisfy resolving the 'input.mp4' target by downloading the specified file from YouTube.
$ make
youtube-dl https://www.youtube.com/watch?v=5xUFQKxdlxE -o input.mp4
[youtube] 5xUFQKxdlxE: Downloading webpage
[youtube] 5xUFQKxdlxE: Downloading video info webpage
[youtube] 5xUFQKxdlxE: Extracting video information
WARNING: unable to extract uploader nickname
[youtube] 5xUFQKxdlxE: Downloading js player vflqFr_Sb
[download] Destination: input.f133.mp4
[download] 100% of 1.13MiB in 00:03
[download] Destination: input.mp4.f140
[download] 100% of 610.47KiB in 00:00
[ffmpeg] Merging formats into "input.mp4"
Deleting original file input.f133.mp4 (pass -k to keep)
Deleting original file input.mp4.f140 (pass -k to keep)
The format of each rule has 3 primary bits: a target, a prerequisite and a command. In our rule, the target is 'input.mp4', there is no prerequisite, and the command is the YouTube download command. Repeated execution of make will have no affect, since the file already exists there is no need to re-execute the rule command.
While simple, this rule doesn't really demonstrate the value of 'make', mostly because of the rule's lack of a prerequisite. Let's look at another:
Note the 2nd rule has a prerequisite. A simple way to read the 2nd rule is "When I need the 1x1.mp4 file, I first need the 'input.mp4' file and once I have it use it in the rule command". Suppose neither the 'input.mp4' nor the '1x1.mp4' file exists and you issue 'make 1x1.mp4';
Make determines in order to create '1x1.mp4' it needs 'input.mp4' (it's prerequisite)
Make then finds the 'input.mp4' rule and executes the rule command, downloading the file from YouTube and generates the target file (e.g. 'input.mp4')
Now that the pre-requisite is resolved, make returns to the '1x1.mp4' rule and executes the rule command, scaling the video file and generating the target
This chaining of dependencies, when done correctly, can execute a complex series of commands in satisfying the final target. Better yet, with make's intrinsic parallelism it can do so quicker than a sequential script. That, my friend, is b-e-a-utiful.
The final target 'output.mp4' is defined as a pre-requisite of the first make rule (e.g. all). Make attempts to execute the final rule, finds a series of pre-requisites (e.g. clip01.mp4...) attempting to satisfy each pre-requisite each of which has pre-requisites of their own. Following the chain of dependencies you'll come to the YouTube download rule, with no pre-requisites. Make then executes that rule, generating the input file and works its way back the dependency chain 'til it is capable of generating the final target.
The final video will start as a 1x1 frame, grow to a 2x2 mosaic, proceed to a 4x4 mosaic.....all the way to a 16x16 mosaic.
I've now used make and ffmpeg in a number of video projects and the more I use them, the more I love using them together. The dependency engine prevents unnecessarily issuing ffmpeg commands when the target file already exists and easily allows incrementally building the series of files necessary for creating the final video.
One
continued frustrating point I struggle with is that often command
line arguments are version-specific at least often enough to present
frustration. For that reason, we'll build FFMpeg from source to make
sure the examples work as expected.
The following is the process for configuring/building FFMpeg from scratch on Ubuntu 17.04. The process should be similar for newer versions as well.
Green screen effects are older than I am, by a significant margin.
The technique; essentially recording a subject in front of a uniformly colored screen, often green, then taking that recording figuratively making all the green background transparent and finally overlaying on another video. The result, the subject filmed in from of the green screen appearing in the context of the second video. Easiest and safest way to film your kids in a shark tank.
Before we get started, the majority of my FFMpeg posts use filters and capabilities that have existed in FFMpeg for quite some time (e.g. v2.7.2), but the chroma key filter is fairly new, I used v3.2.4, but I suspect the capability was introduced some time earlier.
There are a good deal of green screen videos available on YouTube for playing around. Let's demonstrate how to generate a crude green screen.
Let's start with the green screen subject.
Then, let's look at a video we wish to introduce our subject into.
Sprinkle in a little FFMpeg magic;
Prior to overlaying the two videos, they need to be similar in size and framerate. $ ffmpeg -n -i foreground.mp4 -ss 20 -t 120 -strict -2 -s hd720 -r 30 foreground-720p.mp4 $ ffmpeg -n -i background.mp4 -ss 20 -t 120 -strict -2 -s hd720 -r 30 background-720p.mp4
Then, specify the two videos, the color of the green screen and some blending factors.
A pretty common for the open scenes of a video to 'fade in' and 'fade out' at the ending of the video. Ffmpeg provides a video filter to easily apply fading in/out, the subject of this post. Saddle up and prepare to be amazed.
Let's start with a simple 30-second video as our input:
Fade In
The video fade-in filter is of the form fade=in:<startFrame><endFrame>, simply specifying a start and stop reference, the fading will begin at the start point and complete at the stop point. The units, unfortunately, are frame numbers rather than time (e.g. seconds).
Given the video is 24 fps, we can fade into the video in the first 5 seconds by issuing the following command:
The video fade-out filter is of the form fade=out:<startFrame><fade duration>, simply specifying a start and stop reference, the fading will begin at the start point and within the specified duration. The units, unfortunately, are frames rather than time (e.g. seconds).
Fading out the last 10 seconds is a bit trickier, primarily because of the frame units. In order to specify the start/duration references we need to know the number of frames in the video and the fps.
Starting reference would be 719-240 (24fps * 10sec) = 479: $ ffmpeg -y -i opening.mp4 -vf fade=out:479:240 -acodec copy fadeOut-10sec.mp4
Fade In/Out
You can chain fade in and out affects, for instance to fade in the first 10 seconds and fade out the last 10 seconds: $ ffmpeg -y -i opening.mp4 -vf fade=in:0:240,fade=out:479:240 -acodec copy fadeInOut.mp4
CNN does it, many videos with lyrics do it, why pray tell aren't you?
We'll explore the introduction of lyrics in future posts, but it's pretty common to overlay text onto a video. Applying moving text is a bit less common, but easily do-able with a bit of tweaking and patience.
We can overlay the contents of the lyrics file in the form of moving text by the following command: $ ffmpeg -y -i video.mp4 -vf "drawtext=enable='gte(t,0)':fontfile=/usr/share/fonts/truetype/dejavu/DejaVuSans-Bold.ttf:fontsize=36:fontcolor=white:borderw=5:textfile=lyrics.txt:reload=1:y=h-line_h-10:x=W-((W/tw)*325*n+350)" -acodec copy outVideo.mp4
Whoa, that's worthy of a command breakdown:
The drawtext video filter starts with an enable conditional [e.g. enable='gte(t,0)], while it has little affect in this example, this is a way to turn on the drawtext videofilter after a duration has expired. This could prove valuable if you wish to postpone the drawing of text later into the video.
The fontfile is precisely that, the preferred font. You may wish to play around with available fonts to select the most appropriate one for your overlay.
Font size, font color, borderwidth are all specifiers for the overlay font.
The next argument specifies the textfile that contains the overlay contents. The format of the file is important, consisting of 1 continuous line containing the entirety of the lyrics. Short pauses in lyrics can be done by adding spaces.
The reload command implies that the lyrics can change from frame to frame. The last arguments specify the y-position of the beginning of the text. Notice that the y-position video frame height (e.g. h), minus the height of the text along with an additional offset to draw the text up a bit from the absolute bottom of the video. The x-position is the more interesting one, starting at the frame width (e.g. W) and frame-by-frame subtracting a dX.
The result:
It takes a good deal of patience and tweaking to get the timing right.
I began with an overall objective of being able to:
1) get a list of the top 100 songs for a given year from the Billboard Charts
2) perform a search for each song on YouTube using the title and artist
3) download the song
4) overlay the title/artist on the video
5) finally, create a video collage consisting of a 30 sec video clip for each song
Let's walk through the steps. Let's focus on the year 1994 to pay tribute to the high school graduation year of my good friend Marshall, likely the only reader of this blog. That shows true dedication 'Old Fashioned', poor judgement in good use of your time, but true dedication.
I first took the path of parsing the HTML and extracting the music list into a series of strings but I later abandoned that effort by dusting off an old tool that I last used back in college, say 1996-1998'ish. Lynx is a text-based web browser with a sexy little secret, the ability to dump to a text file, making parsing the contents significantly easier.
This command will perform a Youtube search and prioritize videos of MP4 format. The output specifies a prefix, there is not guarantee as to the format. While there are pages of documentation on Youtube-dl we won't get into detail here, know however you can tailor your search to limit format, quality, resolution. frame-rate,.... Given we aren't constraining such video qualities we'll enforce some constraints post-processing the videos after we've downloaded them. We can ensure a H264 format within an MP4 container by examining what was downloaded and reencode it if necessary;
This is a good stage to generate a PNG image to overlay that consists of the List #, Artist and Title:
$ convert -background white -fill black -font FreeSerif-Italic -pointsize 46 label:"1 - Ace of Base - The Sign" 001.png
Step 4 -- Overlay the Title/Artist on the Video
Ensuring the videos share consist resolution and frame-rate will make our lives much easier. For instance, the the font size of overlay PNG is aimed at 720p videos. When we later concatenate the videos into a single video you'll find the input videos need to share a consistent frame-rate or the audio falls out of sync and video can stall out. Let's transcode the Youtube video, normalize it to 720p, 30fps and let's seek in 60 seconds and grab a 30 sec clip.
For the observant reader, you may notice the overlay position of (H-56), this places the PNG image at x,y location 0,720-56. For purposes of understanding, I provided the height dimension of the PNG image which places the overlay where we want it.
Step 5 -- Concatenate the Videos
The last step was the one that gave me the most trouble and made me miss my self-enforced blog deadline last week. Concatenating the videos occasionally resulted in stalled video or Kung Fu Theatre style audio out-of-sync issues. Despite many a Google search, I finally found through extensive debugging that the cause of the problem was supplying input videos that didn't have a consistent frame-rate so take care to enforce that before attempting this step like we did in the previous step.
Concating the videos is pretty straightforward: 1) provide a list of video files in a text file and 2) issue a concat filter via FFMpeg.
$ cat files.txt
file 'clip-001.mp4'
file 'clip-002.mp4'
file 'clip-003.mp4'
file 'clip-004.mp4'
The text file (e.g. files.txt) needs to be located in the same working directory where you issue the FFMpeg command.